1. Introduction
Annypoint SparkSql connector enables Apache Spark SQL to be used in Mule by providing integration inside Mule flows. Spark SQL is Apache Spark’s module for working with structured data, and lets you query structured data inside Spark programs using SQL.
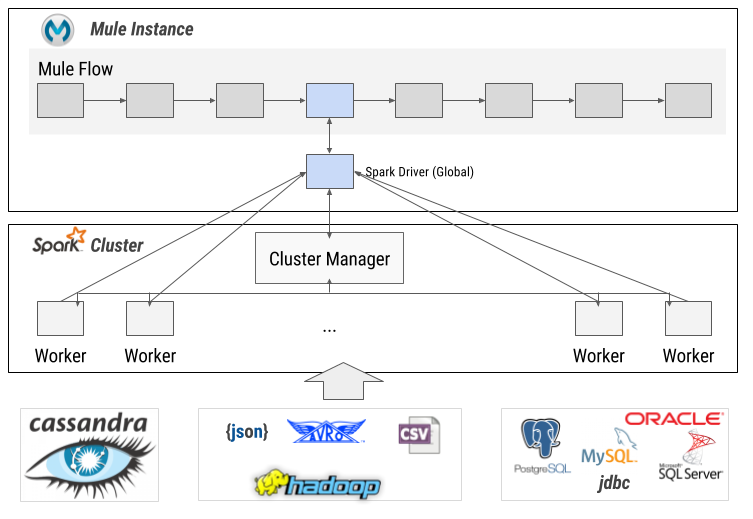
The main functionality the Spark SQL Connector is allowing the execution of Spark jobs to extract structured data using Spark SQL capabilities. Version 1.0.0 allows a user to submit a job (defined as a SQL Query) into a Spark standalone Cluster and retrieve the results as a collection of entities.
The main use case is defining a context with sources like a JSON file at hadoop, a cassandra DB and a PostgreSQL DB and execute a SQL Query (a SparkSQL Job) that joins and filters those data sources and produces, as result, a list of objects with requested data.
SparkSql Connector may use SSL (Secure Socket Layer) to communicate with Spark Master or Spark Workers if configured to. Please note that this connector doesn’t implement any cryptographic directly, it uses the algorithms provided by Java. The form and manner of this SparkSql Connector distribution makes it eligible for export under the License Exception ENC Technology Software Unrestricted (TSU) exception (see the BIS Export Administration Regulations, Section 740.13) for both object code and source code. The following provides more details on the included cryptographic software: * SparkSql Connector may use [Java Secure Socket Extension (JSSE)](http://docs.oracle.com/javase/8/docs/technotes/guides/security/jsse/JSSERefGuide.html) provided by Java.
Read through this user guide to understand how to set up and configure a basic flow using the connector. Track feature additions, compatibility, limitations and API version updates with each release of the connector using the Connector Release Notes. Review the connector operations and functionality using the Technical Reference alongside the SparkSql Demo.
MuleSoft maintains this connector under the Premium support policy.
2. Prerequisites
To use this connector, you need:
-
A Mule Enterprise Runtime v3.6 or newer.
-
A MuleSoft Enterprise License.
-
Anypoint Studio v6 or newer.
This document assumes that you are familiar with Mule, Anypoint Connectors, and Anypoint Studio Essentials. To increase your familiarity with Studio, consider completing a Anypoint Studio Tutorial. This page requires some basic knowledge of Mule Concepts, Elements in a Mule Flow, and Global Elements.
2.1. Hardware and Software Requirements
For hardware and software requirements, please visit the Hardware and Software Requirements page.
2.2. Compatibility
The SparkSql connector is compatible with:
| Application/Service | Version |
|---|---|
Mule Runtime |
EE 3.6.x - 3.8.3 |
Annypoint Studio |
6.0 or newer |
Java |
JDK 7 or newer |
Spark |
Apache Spark 1.6.2 |
2.3. Scope
SparkSql connector integration with Apache SparkSQL has the current Scope:
Version 1.0.0:
Context |
Scope |
Spark Cluster |
Spark Standalone Cluster (No yarn or mesos integration is currently supported). |
Data sources |
Hadoop files (JSON, CSV, Parquet, Avro), JDBC compliant databases, Cassandra (all access is managed by Spark existing drivers). |
SQL |
SparkSQL language support. |
Connector operations |
3. Installing the Connector
You can install the connector in Anypoint Studio using the instructions in Installing a Connector from Anypoint Exchange. However, to use the Apache SparkSQL connector in a production environment, you must have an Enterprise license to use Mule. Contact the MuleSoft Sales Team to obtain either of these. Read more about Installing an Enterprise License.
4. Configuring the Connector Global Element
To use the Apache SparkSql connector in your Mule application, you must configure a global SparkSql Configuration element that can be used by the SparkSql connector (read more about Global Elements).
The global configuration will hold what is usually called the Apache Spark Driver or Spark Context, the process that sends tasks to executors and listen to them during their lifetime (see more details at SparkSql-Connector-apidoc).
In order to execute SQLs through this context (using Apache SparkSql), you will need to correctly configure the driver with information to:
-
Connect to a Spark Cluster (you may use a "local" Spark Worker for developing or testing purposes).
-
Create a SparkSQL context: teach the driver about the data sources that you are willing to inspect.
4.1. Spark Cluster connection properties
The global configuration requires the following fields:
| Field | Description |
|---|---|
Master |
Enter the corresponding master value. Some examples of allowed values for master are: local, spark://IP1:PORT1, … |
App name |
Your application name. This will appear in the UI and in log data. |
SQL Context Type |
Only SQL is supported in this version. |
Spark SQL dependencies.jar |
A single maven artifact (jar) that contains Apache Spark distribution (you will find detailed information about this option later at this document). |

Also, there are other optional configuration fields:
| Field | Description |
|---|---|
Connection Key |
Shared secret currently supported by Apache Spark for authentication (only when security is activated). |
Local IP |
Hostname or IP address for the driver to listen on. This is used for communicating with the executors and the standalone Master. |
Local Port |
Port for the driver to listen on. This is used for communicating with the executors and the standalone Master. |
Avanced Spark conf |
A map that can be used to configure any Apache Spark option that has not a its field at this global element. |
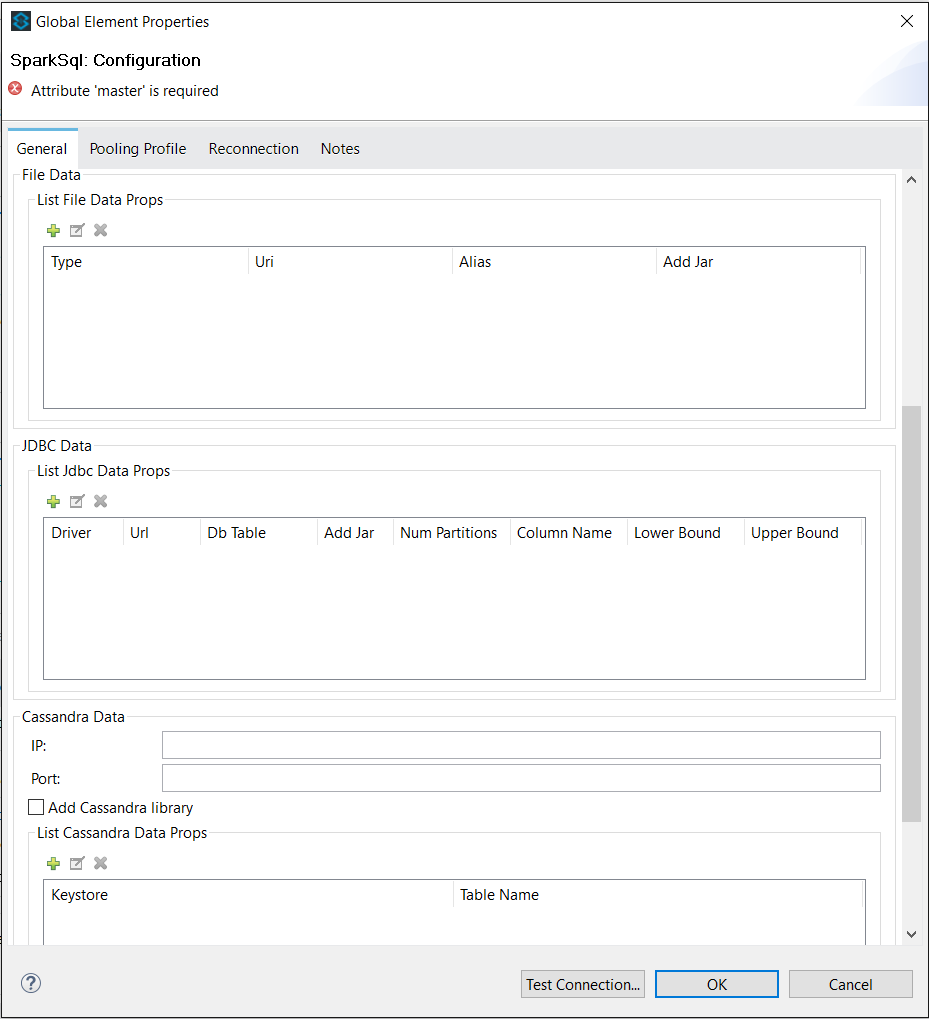
4.2. SparkSQL context properties
This properties are used to configure de SparkSQL Context and register the data sources that will be available as "tables" to be queried by using SQL.
Three main types of data sources are supported in this version:
-
Hadoop HDFS files (JSON, CSV, AVRO, PARQUET).
-
JDBC accesible database tables.
-
Cassandra database tables.
| Field | Description |
|---|---|
File data properties |
A list of files (at Hadoop HDFS) to be included as data sources and that will be available as tables to the the Apache Spark SQL Context. |
JDBC data properties |
A list of JDBC managed database tables to be included as data sources and that will be available as tables to the the Apache Spark SQL Context. |
Cassandra IP |
Cassandra database IP to connect to. Set this option only if you plan to use a Cassandra database as another data source. |
Cassandra Port |
Cassandra database PORT to connect to. Set this option only if you plan to use a Cassandra database as another data source. |
Add Cassandra library |
Flag used to instruct the Spark Context to send cassandra driver to Spark Workers. This is usually required (true) if you plan to use a Cassandra database as another data source. |
Cassandra data properties |
The list of cassandra keyspaces and table names to work with. Set this option only if you plan to use a Cassandra database as another data source. |
4.2.1. File Properties
A list of file data sources will be added to the global configuration to make them available to subsequent queries. Each element will have next information: type, uri, alias, addJar. Where:
-
type is the file type (available values are JSON, CSV, PARQUET and AVRO).
-
uri is the uri where the file is stored at Apache Hadoop HDFS.
-
alias is a temporary table name where to store the file content and use later inside the sql queries.
-
addJar flag used to instruct the Spark Context to send the file type driver to Spark Workers. This is usually required, set to true in not sure.
The next is an example of JSON data source:
    <spark-sql:list-file-data-props>
        <spark-sql:list-file-data-prop type="JSON" uri="hdfs://xxx.xxx.xxx.xxx:19000/user/ex1.json" alias="json_table" addJar="true" />
    </spark-sql:list-file-data-props>
If you want to add this kind of files to the context you will need to add the required dependencies to your projects pom file. Find next examples you can use (for Spark 1.6.2 with Scala 2.10) for CSV and AVRO files:
                <dependency>
                        <groupId>com.databricks</groupId>
                        <artifactId>spark-csv_2.10</artifactId>
                        <version>1.4.0</version>
                        <exclusions>
                                <exclusion>
                                        <groupId>org.scala-lang</groupId>
                                        <artifactId>scala-library</artifactId>
                                </exclusion>
                        </exclusions>
                </dependency>
                <dependency>
                        <groupId>com.databricks</groupId>
                        <artifactId>spark-avro_2.10</artifactId>
                        <version>2.0.1</version>
                        <exclusions>
                                <exclusion>
                                        <groupId>org.apache.avro</groupId>
                                        <artifactId>avro</artifactId>
                                </exclusion>
                                <exclusion>
                                        <groupId>org.scala-lang</groupId>
                                        <artifactId>scala-library</artifactId>
                                </exclusion>
                        </exclusions>
                </dependency>
4.2.2. JDBC Properties
A list of JDBC data sources will will be added to the global configuration to make them available to subsequent queries. Each element will have next information: driver, url, addJar. And the next information is optional: dbTable, numPartitions, columnName, lowerBound, upperBound. Where:
-
driver: the class name of the JDBC driver to use to connect to this URL.
-
url: the JDBC URL to connect to.
-
dbTable: the table to read from (it will be available to use in the queries). If null, then all tables at the URL schema will be added (uppercase).
-
addJar: flag used to instruct the Spark Context to send the jdbc driver to Spark Workers. This is usually required, set to true in not sure.
-
columnName, lowerBound, upperBound and numPartitions options: must all be specified if any of them is specified. They describe how to partition the table when reading in parallel from multiple workers. partitionColumn must be a numeric column from the table in question. Notice that lowerBound and upperBound are just used to decide the partition stride, not for filtering the rows in table. So all rows in the table will be partitioned and returned.
JDBC Properties Example:
<spark-sql:list-jdbc-data-props>
    <spark-sql:list-jdbc-data-prop driver="driver" dbTable="table_name" url="JDBC_URL" addJar="true"/>
</spark-sql:list-jdbc-data-props>
If you want to add this kind of databases to the context you will need to add the required dependencies to your projects pom file. Find next an example you can use to add support for Derby database:
<dependency>
    <groupId>org.apache.derby</groupId>
    <artifactId>derbyclient</artifactId>
    <version>10.4.2.0</version>
</dependency>
4.2.3. Cassandra Properties
Current connector version supports configuring a single Cassandra instance, but it allows adding multiple tables (and keyspaces) to the SparkSQL Context (and make them available as tables to SQL Queries).
You will need to add an entry for each table (and its keyspace) you want to add to the context. Each entry requires next information:
-
keyspace: cassandra keyspace where the table is defined.
-
tableName: cassandra table name (and the alias to use later). If null, then all tables at the keyspace will be added to the context.
Cassandra Properties Example:
<spark-sql:list-cassandra-data-props>
    <spark-sql:list-cassandra-data-prop keyspace="sparksql_connector_keyspace" tableName="tableName"/>
</spark-sql:list-cassandra-data-props>
If you want to add cassandra tables to the context you will need to add the required dependencies to your projects pom file. Find next an example you can use to add support for Cassandra database:
<dependency>
    <groupId>com.datastax.spark</groupId>
    <artifactId>spark-cassandra-connector_2.10</artifactId>
    <version>1.6.2</version>
        <exclusions>
                <exclusion>
                        <groupId>org.scala-lang</groupId>
                        <artifactId>scala-reflect</artifactId>
                </exclusion>
                <exclusion>
                        <groupId>org.scala-lang</groupId>
                        <artifactId>scala-library</artifactId>
                </exclusion>
        </exclusions>
</dependency>
5. Add spark-sql-lib
The spark-sql-lib is a single java archive (jar) that contains a full spark distribution. It allows the connector to create a Spark driver (Spark Context) and is a mandatory peace to get the connector working.
There are several ways to get this jar:
-
Configure a public maven artifacts repository at mnemo where several versions of this library can be found.
-
Build your own library and deploy it into your maven artifacts repository.
5.1. Mnemo artifacts repository
You will need to modify your POM:
-
Add the Mnemo artifacts repository.
<repositories>
    <repository>
        <id>mnemo-releases</id>
        <name>Mnemo Releases Repository</name>
        <url>https://repo.mnemo.com/maven2/</url>
        <layout>default</layout>
    </repository>
</repositories>
-
Then, add the dependency.
<dependencies>
    <dependency>
        <groupId>com.mnemo.spark</groupId>
        <artifactId>spark-sql-lib_${scala.version}</artifactId>
        <version>1.6.2-b1</version>
        <scope>provided</scope>
    </dependency>
</dependencies>
Where scala.version must meet your environment requirements (currently 2.10 or 2.11 scala versions are supported).
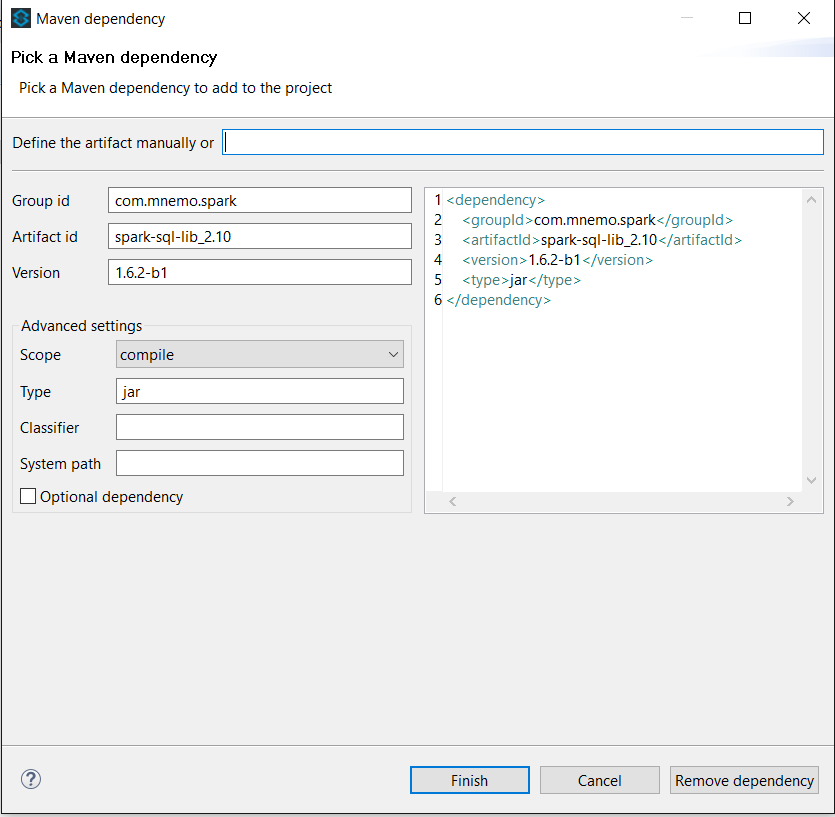
You may also use the Anypoint studio interface:
5.2. Build your own artifact
Follow next steps to generate your custom spark-sql-lib:
-
Create a new maven project with this required information:
-
Group Id: for example, com.mycompany.spark
-
Artifact Id: it must have the next name: spark-sql-lib_<SCALA_VERSION>, for example, spark-sql-lib_2.10
-
Version: it should contain the spark version, for example, 1.6.2
-
-
Edit your pom.xml to add the spark and scala required libraries. You can use the pom example as template (set the correct scala.version and spark.version):
<project xmlns="http://maven.apache.org/POM/4.0.0" xmlns:xsi="http://www.w3.org/2001/XMLSchema-instance"
  xsi:schemaLocation="http://maven.apache.org/POM/4.0.0 http://maven.apache.org/xsd/maven-4.0.0.xsd">
  <modelVersion>4.0.0</modelVersion>

  <groupId>com.mycompany.spark</groupId>
  <artifactId>spark-sql-lib_2.10</artifactId>
  <version>1.6.2</version>
  <packaging>jar</packaging>

 <name>Spark SQL lib</name>
        <description>"all-in-one-jar" spark dependencies, shaded to avoid dependency problems and optimized to avoid duplicated libraries with mule runtime</description>

        <properties>
                <scala.version>2.10</scala.version>
                <spark.version>1.6.2</spark.version>
        </properties>

        <dependencies>
                <dependency>
                        <groupId>org.apache.spark</groupId>
                        <artifactId>spark-sql_${scala.version}</artifactId>
                        <version>${spark.version}</version>
                </dependency>
                <!-- CTF: 1.8.1 is the version of commons-compress in junit 4.12 -->
                <dependency>
                    <groupId>org.apache.commons</groupId>
                    <artifactId>commons-compress</artifactId>
                    <version>1.8.1</version>
                </dependency>
        </dependencies>

        <build>
                <plugins>
                        <plugin>
                                <groupId>org.apache.maven.plugins</groupId>
                                <artifactId>maven-compiler-plugin</artifactId>
                                <version>3.5.1</version>
                                <configuration>
                                        <source>1.7</source>
                                        <target>1.7</target>
                                </configuration>
                        </plugin>
                        <plugin>
                                <groupId>org.apache.maven.plugins</groupId>
                                <artifactId>maven-shade-plugin</artifactId>
                                <version>2.4.3</version>
                                <executions>
                                        <execution>
                                                <phase>package</phase>
                                                <goals>
                                                        <goal>shade</goal>
                                                </goals>
                                                <configuration>
                                                        <filters>
                                                                <filter>
                                                                        <artifact>*:*</artifact>
                                                                        <excludes>
                                                                                <exclude>META-INF/*.SF</exclude>
                                                                                <exclude>META-INF/*.DSA</exclude>
                                                                                <exclude>META-INF/*.RSA</exclude>
                                                                        </excludes>
                                                                </filter>
                                                        </filters>
                                                        <transformers>
                                                                <transformer
                                                                        implementation="org.apache.maven.plugins.shade.resource.AppendingTransformer">
                                                                        <resource>reference.conf</resource>
                                                                </transformer>
                                                                <transformer
                                                                        implementation="org.apache.maven.plugins.shade.resource.ServicesResourceTransformer" />
                                                                <transformer
                                                                        implementation="org.apache.maven.plugins.shade.resource.ManifestResourceTransformer">
                                                                        <manifestEntries>
                                                                                <Bundle-SymbolicName>org.datanucleus;singleton:=true</Bundle-SymbolicName>:
                                                                                <Premain-Class>org.datanucleus.enhancer.DataNucleusClassFileTransformer</Premain-Class>
                                                                        </manifestEntries>
                                                                </transformer>
                                                        </transformers>
                                                </configuration>
                                        </execution>
                                </executions>
                        </plugin>

                </plugins>
        </build>
</project>
You will also need to add next file at src/main/resources: plugin.xml.
-
Go to project folder and build the artifact using maven (mvn clean deploy for example).
6. Using the Connector
6.1. Connector Namespace and Schema
When designing your application in Studio, the act of dragging the connector from the palette onto the Anypoint Studio canvas should automatically populate the XML code with the connector namespace and schema location.
Namespace:
<xmlns:spark-sql="http://www.mulesoft.org/schema/mule/spark-sql"
Schema Location:
xsi:schemaLocation="...
http://www.mulesoft.org/schema/mule/spark-sql http://www.mulesoft.org/schema/mule/spark-sql/current/mule-spark-sql.xsd
..."
|
Tip
|
If you are manually coding the Mule application in Studio’s XML editor or other text editor, define the namespace and schema location in the header of your Configuration XML, inside the <mule> tag. |
<mule xmlns="http://www.mulesoft.org/schema/mule/core"
      xmlns:xsi="http://www.w3.org/2001/XMLSchema-instance"
      xmlns:connector="http://www.mulesoft.org/schema/mule/connector"
          xmlns:spark-sql="http://www.mulesoft.org/schema/mule/spark-sql"
      xsi:schemaLocation="
               http://www.mulesoft.org/schema/mule/core
               http://www.mulesoft.org/schema/mule/core/current/mule.xsd
               http://www.mulesoft.org/schema/mule/connector
               http://www.mulesoft.org/schema/mule/connector/current/mule-connector.xsd
                           http://www.mulesoft.org/schema/mule/spark-sql http://www.mulesoft.org/schema/mule/spark-sql/current/mule-spark-sql.xsd">

      <spark-sql:config name="SparkSql__Configuration" master="spark://xxx.xxx.xxx.xxx:17077" appName="pruebas" localIp="xxx.xxx.xxx.xxx" sqlContextType="SQL" doc:name="SparkSql: Configuration">

          </spark-sql:config>

</mule>
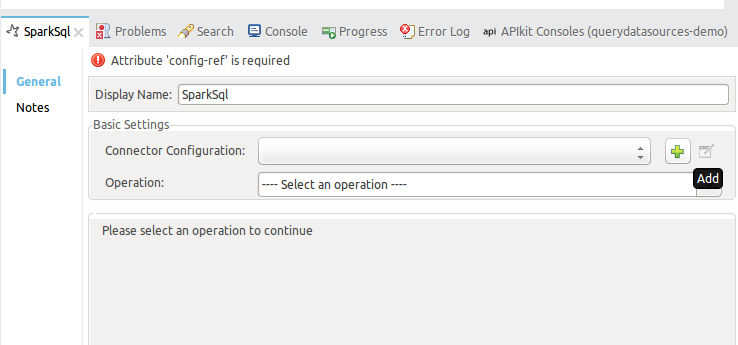
6.2. Adding the SparkSql Connector to a Flow
-
Drag and drop the SparkSql connector onto the canvas, then select it to open the properties editor.
-
Configure the connector’s parameters selecting the SparkSql Configuration created earlier.
-
Configure the connector’s parameters selecting the operation from the Operation dropdown:
-
For Custom sql operation set the custom sql to execute.
-
For Drop temporary table operation set the temporary table name to drop.
-
For Sql select operation select the Query language:
-
For Native query language set the Query text to execute.
-
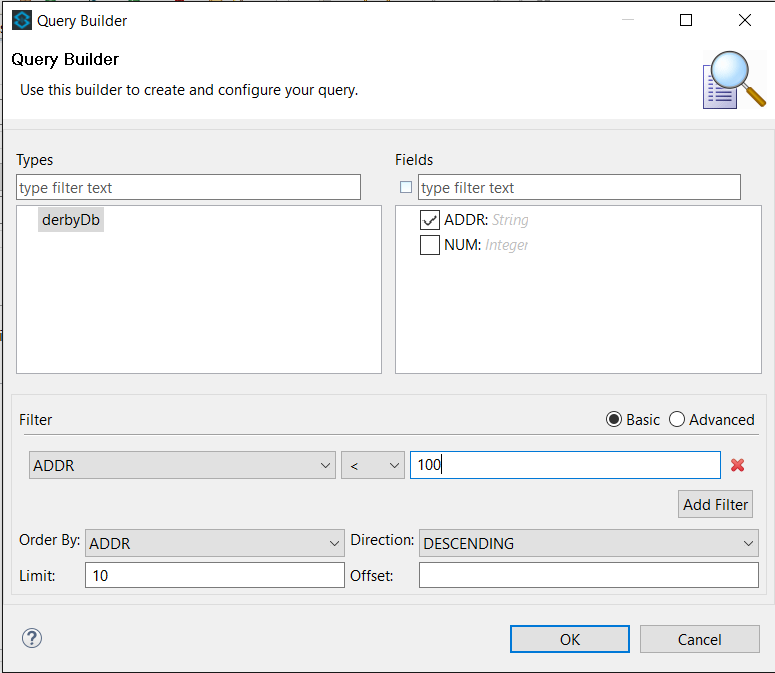
For Data sense query language select the table, fields, filters, order and limits to query, accross the Query builder… option.
-
-
-
If you will save the result into a temporary table set the Temporary table name.
-
Check Streaming if you will return the results as an java.util.Iterator instead of a java.util.List.
6.3. Using the Connector in a Mavenized Mule App
If you are coding a Mavenized Mule application, this XML snippet must be included in your pom.xml file.
<dependency>
  <groupId>org.mule.modules</groupId>
  <artifactId>spark-sql-connector</artifactId>
  <version>1.0.0</version>
</dependency>
|
Tip
|
Inside the
|
7. Demo Mule Applications Using Connector
8. Example Use Case
8.1. Introduction
As mentioned before, the main use case for the Spark SQL Connector is allowing the execution of SQL (as a Spark job) to extract structured data using Spark SQL capabilities. At this section a didactic scenario involving a social network is proposed.
In this social network, because of historical reasons, information is stored on several heterogeneous sources. The next are some examples:
-
User profiles and known devices are located at a mysql database.
-
Website and mobile APP activity is stored at a Cassandra database.
-
User devices historic geo-location (if available) is stored by an external provider at a PARQUET file in Apache Hadoop HDFS.
Actually, this information is exactly what is needed to perform some analysis about user activity: join this data sources, aggregate some activity types and locations and extract information to feed a ML system that will be used to try to infer some user home and job conditions.
To acomplish this, it is required to create an interface to allow the analyst to get this information cross by using SQL. This interface must be a HTTP service that must be able to receive a POST message containing the SQL to execute and return a JSON with the query results.
8.2. Steps
These are the steps to implement this interface with mule using Spark SQL Connector:
-
Create a new Mule maven project.
-
Add the HTTP connector.
-
Add and configure the Spark SQL Connector to run the query.
-
Add an "object to json" transformer.
-
Run and test.
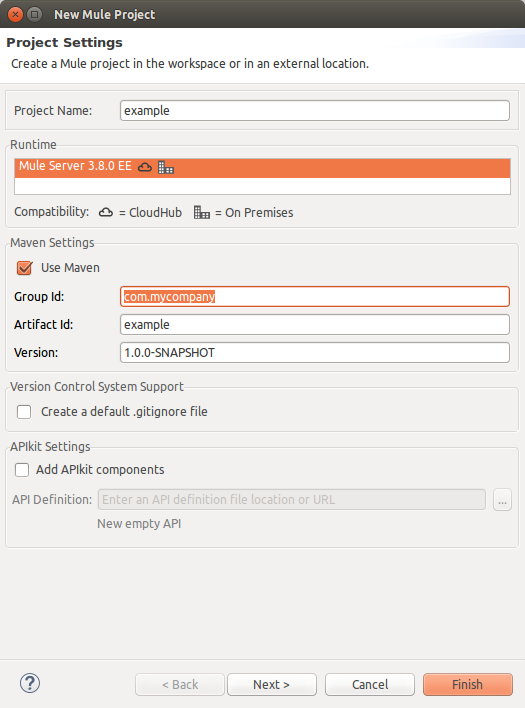
8.2.1. Create a new Mule maven project
Open Anypoint Studio and create a new Mule maven project by clicking, at the main menu, File → New → Mule Project.
Name the project example, select Mule runtime (3.6.x or newer), click Use Maven and press Finish button.
8.2.2. Add the HTTP connector
If not opened, double click at example.xml mule configuration file.
At the Mule palette find and select the HTTP Connector.
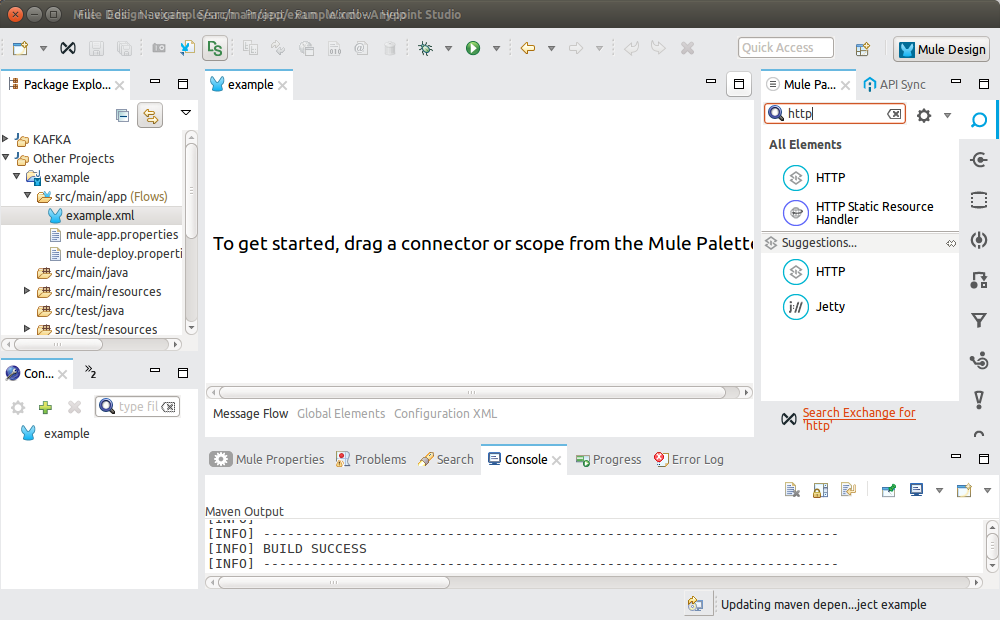
And drag it into the mule configuration file view.
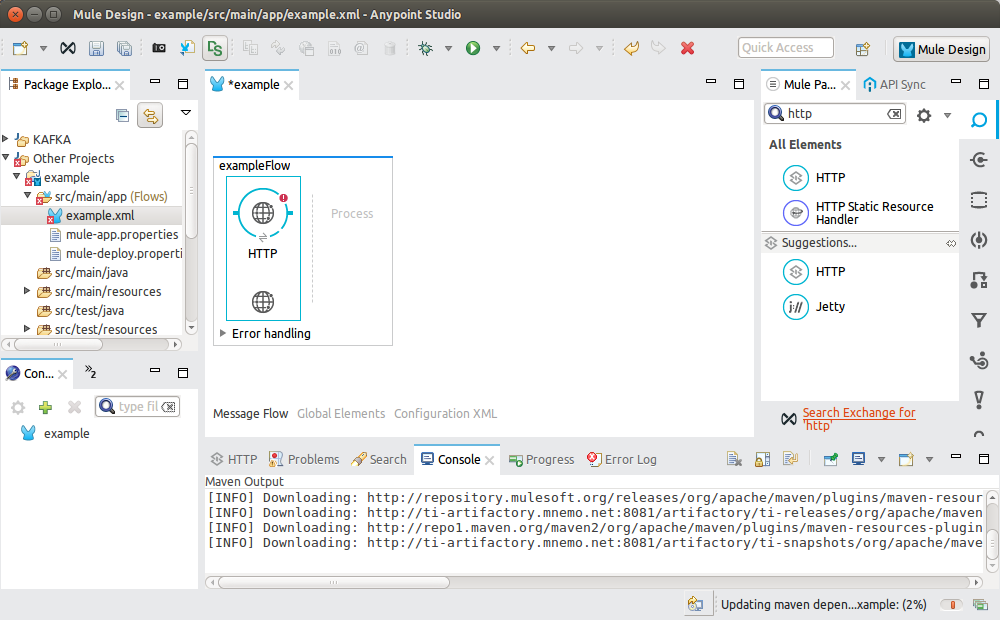
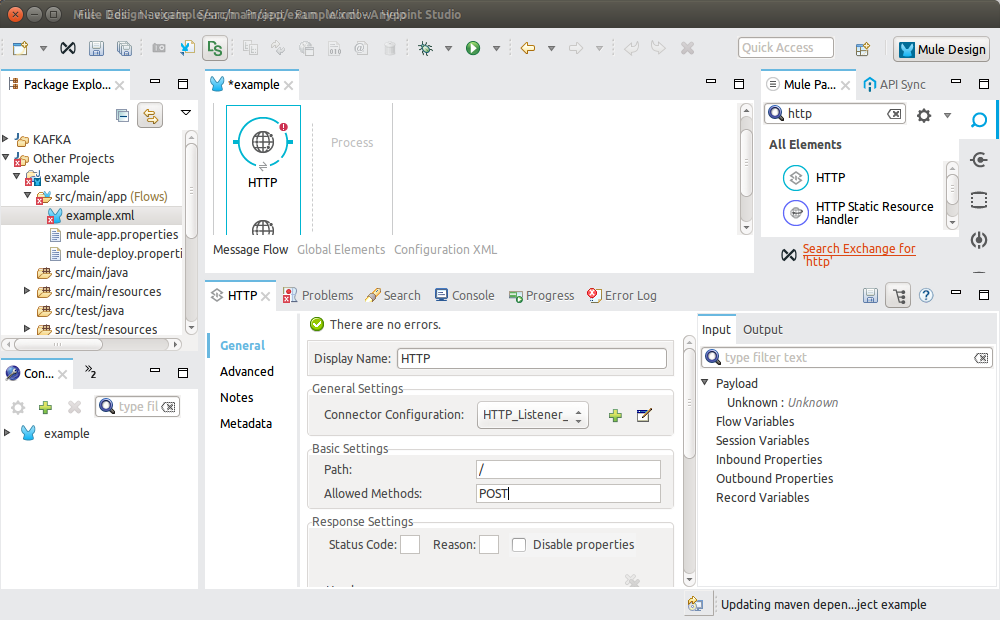
Click at the element you just have added to configure it.
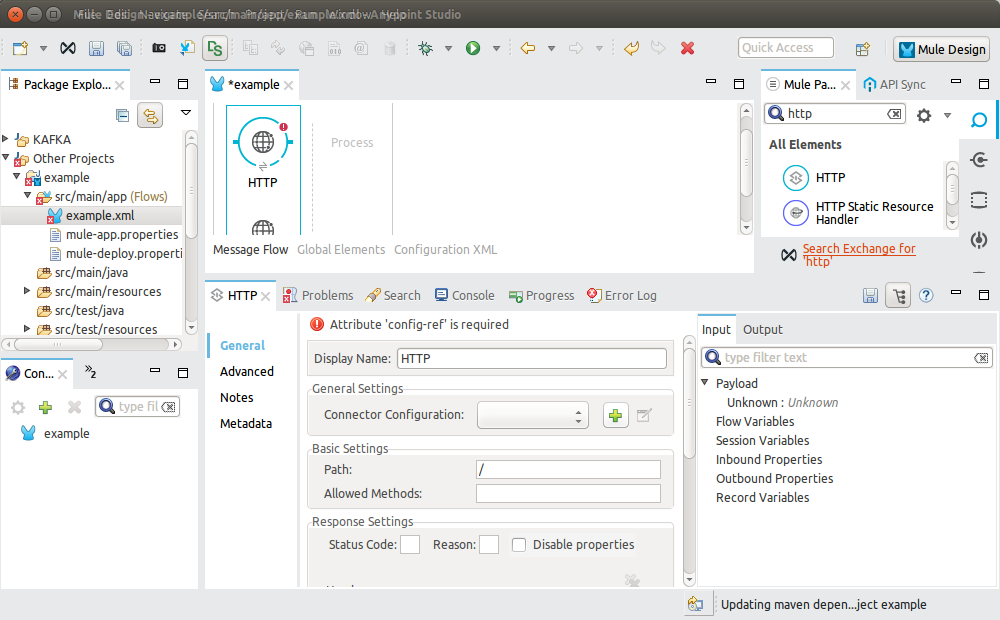
At the Mule properties panel you will see an empty configuration. Press the plus simbol image button to create a new Global Http configuration.
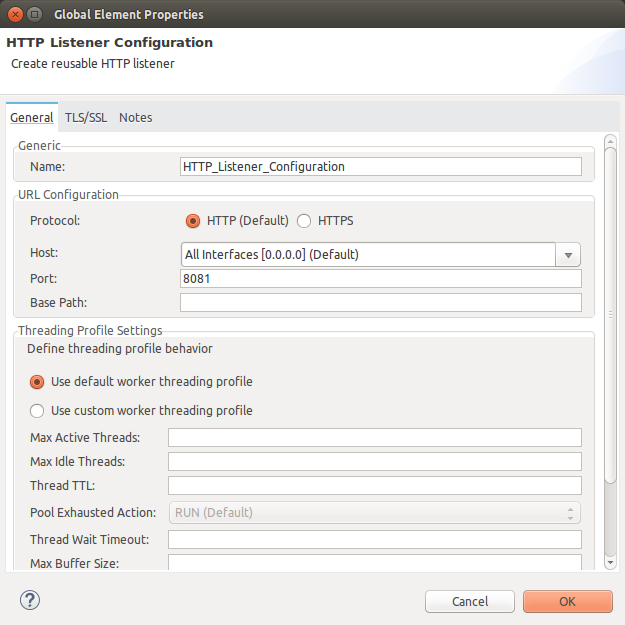
Accept the default configuration by pressing OK button.
Finish connector configuration by writing POST at the Mule properties panel inside the Allowed Methods field.
Save the configuration file.
8.2.3. Add "Spark SQL Connector" connector
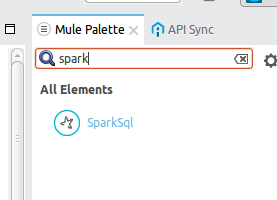
At the Mule palette find and select the SparkSQL Connector.
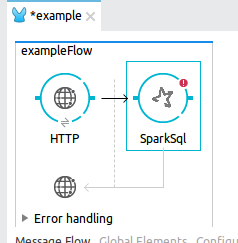
Drag it and drop it at the mule flow after the HTTP Connector.
At the Mule properties panel you will see an empty configuration. Press the plus simbol image button to create a new Global SparkSQL configuration.
8.2.3.1. Common Global Configuration
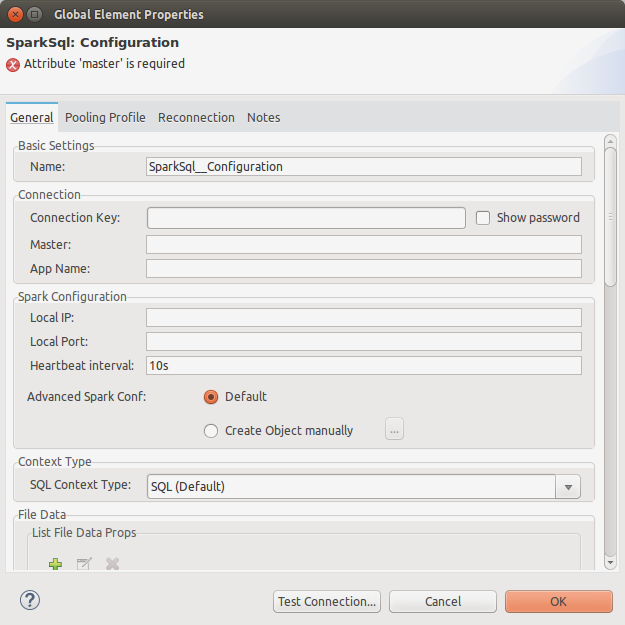
You will need to add next information (at least):
-
Master: Spark Standalone Master URL. You may use local for testing purposes.
-
App Name: your application’s name, it will appear at logs and diagnostics.
If the machine running Mule has several network devices you will need to fill (not needed if you set master to local):
-
Local IP: the IP of the network device the Spark Context (driver) will listen to Spark workers (this is needed to let the workers know the IP to connect to speak with the driver).
8.2.3.2. Add Hadoop HDFS File data sources

To add a HDFS File data sources you will need to press the "plus" button and then "modify". The next dialog will appear:
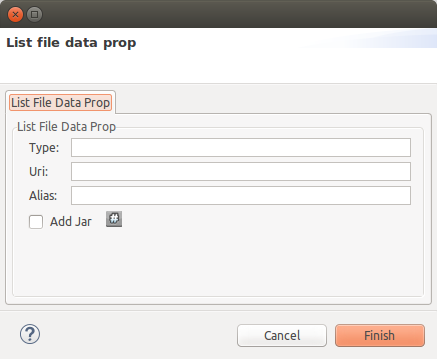
Introduce next information:
-
Type: file type, must be a supported one, for example CSV.
-
Uri: the URI of the file as a HDFS resource.
-
Alias: the table alias name to use in SQL sentences to access file content.
-
Add jar: This is usually required (true).
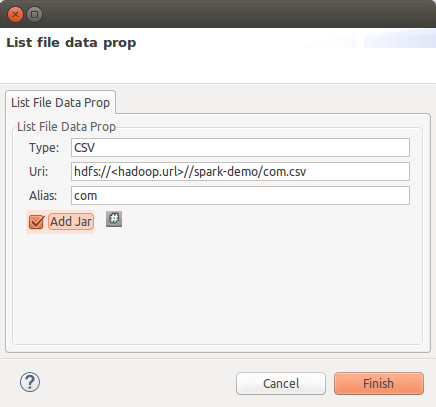
Press finish once you have filled all required information, a new file resource will be shown at the table:
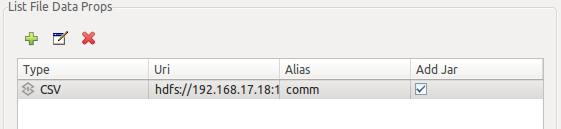
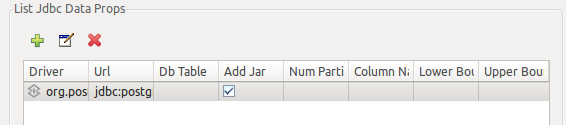
8.2.3.3. Add JDBC data sources
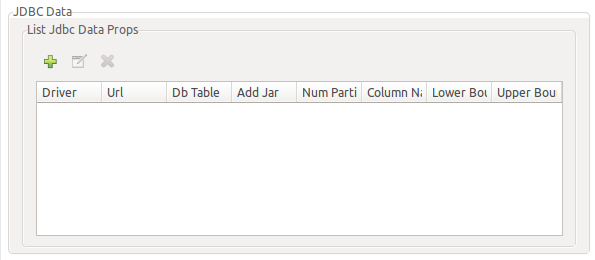
To add a JDBC data sources you will need to press the "plus" button and then "modify". The next dialog will appear:
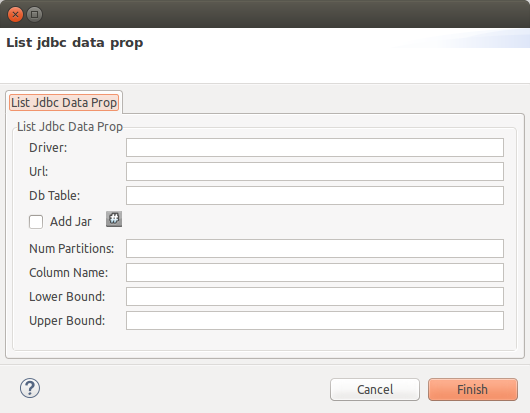
Introduce next information (at least):
-
Driver: JDBC driver class name for your database.
-
Url: JDBC URL to connect to your database.
-
Db Table: the table to use in SQL sentences, leave this field empty in order to import all tables in the schema.
-
Add jar: This is usually required (true).
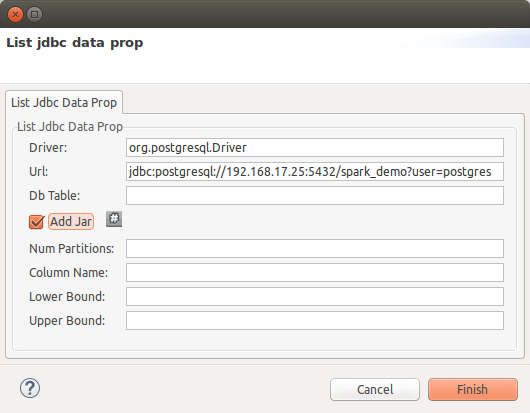
Press finish once you have filled all required information, a new jdbc resource will be shown at the table:
8.2.3.4. Add Cassandra data sources
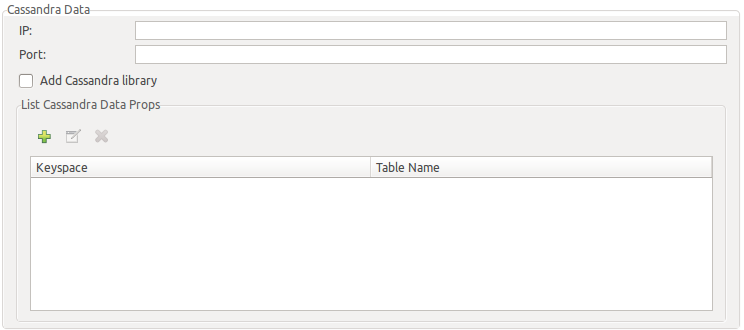
Currently you may import tables from a single Cassandra instance. You will need to initially setup next fields:
-
IP: Cassandra database IP to connect to.
-
Port: Cassandra database PORT to connect to.
-
Add Cassadra library: This is usually required (true).
To add a Cassandra tables you will need to press the "plus" button and then "modify". The next dialog will appear:
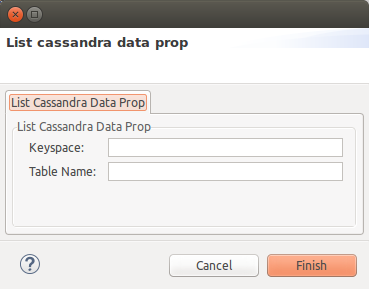
Introduce next information (at least):
-
Keyspace: Cassandra keyspace.
-
Table Name: Cassandra table name, leave it empty to import all tables at the keyspace.
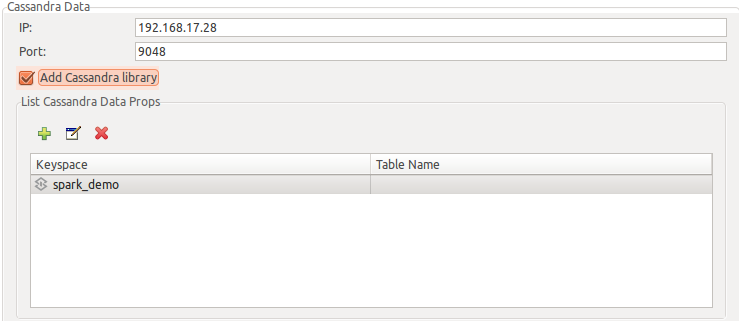
Press finish once you have filled all required information, a new cassandra resource will be shown at the table:
8.2.3.5. Add required dependencies
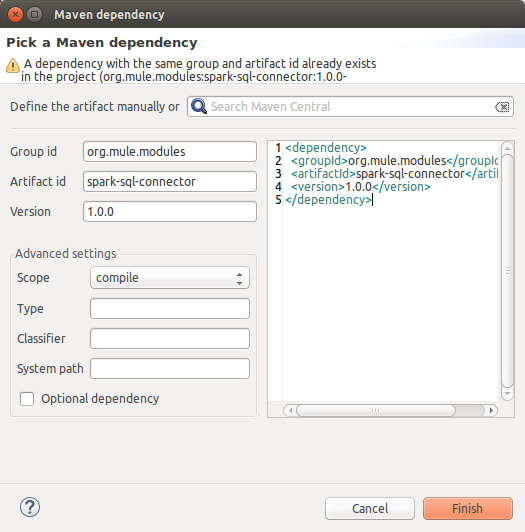
At the end of the configuration dialog, at the required dependencies section, press the button "Add dependency" next to "Spark SQL Dependency" entry.

Then, add next dependency:
<dependency>
  <groupId>org.mule.modules</groupId>
  <artifactId>spark-sql-connector</artifactId>
  <version>1.0.0</version>
</dependency>
Press "Ok" button once connector configuration is finished.
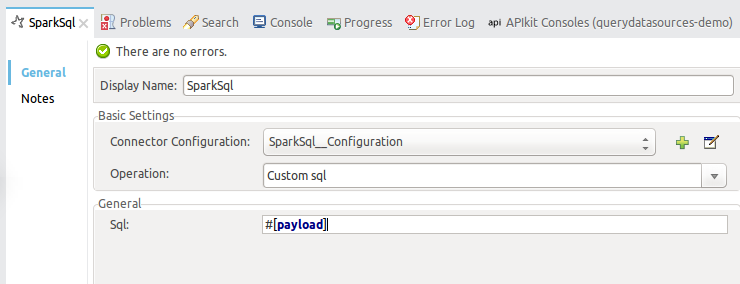
8.2.3.6. Configure SparkSQL Connector
Back to the SparkSQL Connector properties, you will need to fill:
-
Operation: select custom sql.
-
Sql: insert _#[payload] as the query will come in the HTTP request body.
8.2.4. Add "object to json" transformer
At the Mule palette find and select the Object to JSON transformer.
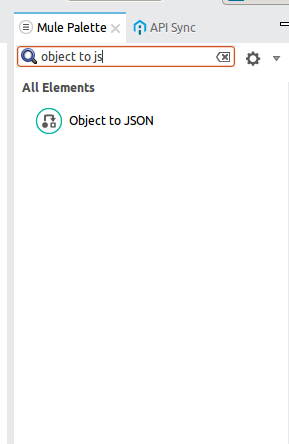
Drag it and drop it at the mule flow after the Spark SQL Connector.
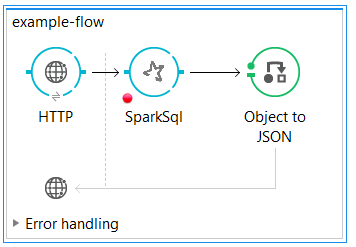
This way a legible response will be sent to the client.
8.2.5. Run and test
Right click over the mule configuration file and press Run project example at the contextual menu.
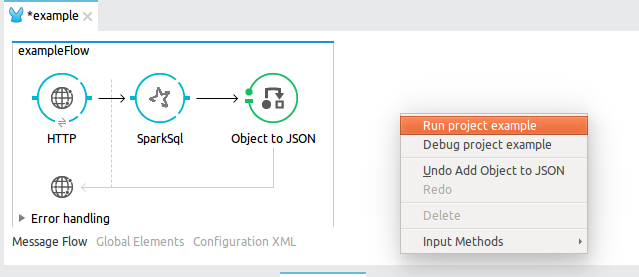
Open a HTTP client program like Google 'Postman' and use it to send queries and see results. For example, you can start with some queries to discover the structure of the data sources (show tables, describe <TABLE>).
For example, using Google 'Postman' to send show tables query:
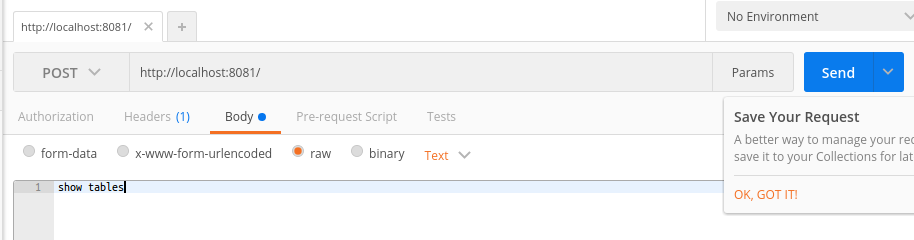
Response (example):
[
  {
    "isTemporary": true,
    "tableName": "users"
  },
  {
    "isTemporary": true,
    "tableName": "devices"
  },
  {
    "isTemporary": true,
    "tableName": "user_devices"
  },
  {
    "isTemporary": true,
    "tableName": "ws_activity"
  },
  {
    "isTemporary": true,
    "tableName": "app_activity"
  },
  {
    "isTemporary": true,
    "tableName": "activity_data"
  },
  {
    "isTemporary": true,
    "tableName": "ws_activity"
  },
  {
    "isTemporary": true,
    "tableName": "geolocations"
  }
]
8.3. Example Use Case - XML
<?xml version="1.0" encoding="UTF-8"?>

<mule xmlns:tracking="http://www.mulesoft.org/schema/mule/ee/tracking" xmlns:json="http://www.mulesoft.org/schema/mule/json" xmlns:http="http://www.mulesoft.org/schema/mule/http" xmlns:spark-sql="http://www.mulesoft.org/schema/mule/spark-sql" xmlns="http://www.mulesoft.org/schema/mule/core" xmlns:doc="http://www.mulesoft.org/schema/mule/documentation"
        xmlns:spring="http://www.springframework.org/schema/beans"
        xmlns:xsi="http://www.w3.org/2001/XMLSchema-instance"
        xsi:schemaLocation="http://www.springframework.org/schema/beans http://www.springframework.org/schema/beans/spring-beans-current.xsd
http://www.mulesoft.org/schema/mule/core http://www.mulesoft.org/schema/mule/core/current/mule.xsd
http://www.mulesoft.org/schema/mule/spark-sql http://www.mulesoft.org/schema/mule/spark-sql/current/mule-spark-sql.xsd
http://www.mulesoft.org/schema/mule/json http://www.mulesoft.org/schema/mule/json/current/mule-json.xsd
http://www.mulesoft.org/schema/mule/http http://www.mulesoft.org/schema/mule/http/current/mule-http.xsd
http://www.mulesoft.org/schema/mule/ee/tracking http://www.mulesoft.org/schema/mule/ee/tracking/current/mule-tracking-ee.xsd">
    <spark-sql:config name="SparkSql__Configuration" master="local[3]" appName="example" sqlContextType="SQL" doc:name="SparkSql: Configuration">
        <spark-sql:list-jdbc-data-props>
            <spark-sql:list-jdbc-data-prop driver="org.apache.derby.jdbc.ClientDriver" dbTable="derbyDb" url="jdbc:derby://xxx.xxx.xxx.xxx:1527/MyDbTest" addJar="true"/>
        </spark-sql:list-jdbc-data-props>
    </spark-sql:config>
    <http:listener-config name="HTTP_Listener_Configuration" host="0.0.0.0" port="8081" doc:name="HTTP Listener Configuration"/>
    <flow name="example-flow">
        <http:listener config-ref="HTTP_Listener_Configuration" path="/" doc:name="HTTP"/>
        <spark-sql:sql-select config-ref="SparkSql__Configuration" doc:name="SparkSql" sqlSelect="select * from derbyDb"/>
        <json:object-to-json-transformer doc:name="Object to JSON"/>
    </flow>
</mule>
9. See Also
Access full reference documentation for the connector here.